Pengenalan Packet Tracer 7.0 Lengkap dengan Fitur barunya dan Cara Menggunakan Packet Tracer 7
Pengenalan Packet Tracer 7.0 Fitur barunya Sampe dengan
Cara Menggunakan Packet Tracer 7
Cara Menggunakan Packet Tracer 7
Catatan gw tentang packet tracer... apa itu packet tracer?
ok.. let me explain ...
ok.. let me explain ...
Kali ini gw mau kenalin software yg namanya Cisco Packet Tracer. iya yg buat si Cisco Systems makanya diawal namanya musti gw kasi pembuatnya. kalo kalian pengen tau sejarahnya nih silahkan dibaca ya. karena disini bukan sejarah dari software ini yg mau gw bahas. tp lebih ke pengenalan dan cara gunainnya serta fitur-fitur baru atau fitur tambahan dari Packet Tracer 7 ini. dimana seperti yg kita ketahui packet tracer 7 ini adalah versi yg paling baru(2016).
Seperti biasa sebelum belajar/tau lebih banyak tentang Packet tracer lo harus punya dulu softwarenya. kalo balom punya silahkan di download packet tracer 7 (versi terbaru).
kemudian install sampai selesai. biasanya kalo udah selesai gitu pengalaman gw dulu pas waktu pertama install ni software harus login netacad.com sebagai bagian dari member/student nya cisco.
kalo ga login dulu kita cuma dikasi kesempatan trial hingga 10 kali save file aja(abis itu di suruh nunggu 10 sec lagi buat buka ni software). jadi aku saranin mending jd membernya dulu aja.
ok.. lanjut ke step berikutnya yaitu penganalan ini software....(PT 7)
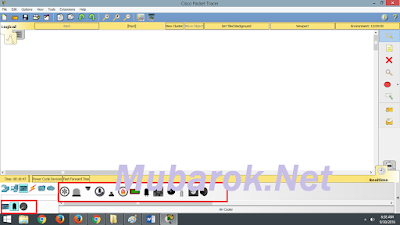
Kira-kira seperti inilah tampilan dari packet tracer saat kita buka (first time)...
 |
| tampilan packet tracer 7 |
1
|
Menu Bar
|
This bar provides
the File, Edit, Options, View, Tools, Extensions,
and Help menus.
You will find basic commands such as Open, Save, S
ave as Pkz, Print, and Preferences in these
menus. You will also be
able to access the Activity Wizard from
the Extensions menu.
|
2
|
Main Tool Bar
|
This bar provides
shortcut icons to the File and Edit menu
commands. This bar also provides buttons for Copy, Paste, Undo, Redo, Zoom,
the Drawing Palette, and the Custom Devices Dialog.
On the right, you will also find the Network Information button,
which you can use to enter a description for the current network (or any text
you wish to include).
|
3
|
Logical/Physical
Workspace and Navigation Bar
|
You can toggle
between the Physical Workspace and the Logical Workspace with the tabs on this
bar. In Logical Workspace, this bar also allows you to go back to a previous
level in a cluster, create a New Cluster, Move Object, Set
Tiled Background, and Viewport. In Physical Workspace, this
bar allows you to navigate through physical locations, create a New
City, create a New Building, create a New Closet, Move
Object, apply a Grid to the background, Set
Background, and go to the Working Closet.
|
4
|
Common Tools Bar
|
This bar provides
access to these commonly used workspace tools: Select, Move
Layout, Place Note, Delete, Inspect, Resize
Shape, Add Simple PDU, and Add Complex PDU. See
"Workspace Basics" for more information.
|
5
|
Realtime/Simulation
Bar
|
You can toggle
between Realtime Mode and Simulation Mode with the tabs on this bar. This bar
also provides buttons to Power Cycle Devices and Fast
Forward Time as well as the Play Control buttons
and the Event List toggle button in Simulation Mode. Also, it
contains a clock that displays the relative Time in Realtime
Mode and Simulation Mode.
|
6
|
Device-Type
Selection Box
|
This box contains
the type of devices and connections available in Packet Tracer. The Device-Specific
Selection Box will change depending on which type of device you
choose.
|
7
|
Device-Specific
Selection Box
|
This box is where
you choose specifically which devices you want to put in your network and
which connections to make.
|
8
|
Workspace
|
This area is where
you will create your network, watch simulations, and view many kinds of
information and statistics.
|
yang point ke 6 dan 7 itu bisa kita sebut dengan Network Component Box dimana disitu kita bisa milih device apa yang mau kita gunain.
Berikut ini adalah fitur-fitur baru dari packet tracer 7 yang gak bakalan kalian nemu di versi2 sebelumnya.(ya iyalah kan fitur baru wkwkw)...
dimana device2 ini diperuntukkan untuk Internet of Things (IoT) atau Internet of Everything (IoE). akan gw jelaskan di artikel berikutnya ^_^ .
 |
| Komponen-komponen smarthome |
 |
| Komponen-komponen smartcity |
 |
| Komponen-komponen smartindustrial |
 |
| Komponen-komponen Power Grid |
 |
| Komponen-komponen Electronica (Board) |
 |
| Komponen-komponen Electronica (Actuator) |
 |
| Komponen-komponen Electronica (Sensor) |
itulah beberapa fitur baru packet tracer 7 (gw sebutnya PT Ronaldo)
ok cukup yaa kenalan sama PT nya, kini tibalah saatnya kita masuk ke bagaimana cara menggunakannya dari dasar sampe ke komponen-komponen simulator elektronikanya.
